“From Worm Bins to Backyard Piles, Here’s How to Start Composting Like a Pro (Even If You’re Clueless).”
Okay, so let’s talk about composting—turning your kitchen scraps into straight-up garden gold. It’s like magic, but real, and it’s one of the easiest ways to cut down on waste, save some cash, and make your plants do a happy dance. I’m gonna walk you through the basics of traditional composting and then spill the tea on worm composting, which, trust me, is a game-changer for beginners.
Why Composting’s a Big Deal
Keeps Trash Out of Landfills: Americans chuck about 30% of their food, and when it rots in landfills, it pumps out methane—a gas 25 times worse for climate change than CO2. Composting stops that nonsense.
Makes Your Soil Sing: Compost is packed with nutrients that make your plants thrive and hold onto water like a pro.
Saves You Money: Forget dropping $40-50 every spring on fertilizer or bagged compost. Composting gives you premium stuff for free.
Feels Good, Man: There’s something legit satisfying about turning your banana peels into something that helps the planet.
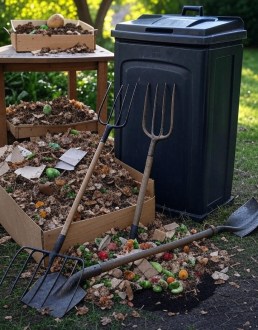
Traditional Composting: The Outdoor OG
What You Need
A Bin or Pile: Grab a store-bought compost bin, build your own, or just make a pile in your yard.
Browns and Greens: You need carbon-heavy “browns” (think dry leaves, cardboard) and nitrogen-packed “greens” (like veggie scraps, coffee grounds).
A Pitchfork or Shovel: To flip the pile and keep things airy.
Optional: A countertop caddy to collect kitchen scraps without running outside every five minutes.
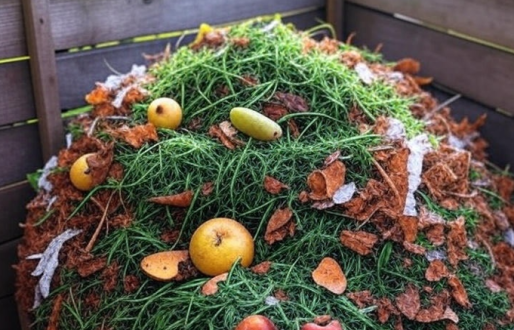
What to Toss In
Greens (Nitrogen Vibes)
Fruit and veggie peels
Coffee grounds
Fresh grass clippings
Plant trimmings
Browns (Carbon Crew)
Dry leaves
Shredded paper or cardboard
Straw or hay
Small twigs
Hard No’s
No oily foods or grease. No pet poop or diseased plants. No meat, fish, or dairy (unless you want rats as roommates). No non-biodegradable stuff (plastic, metal, you get it).
<<< Yes yes yes, Greens or Browns only!
“Layer it, turn it, love it.”

How to Do It
-
Pick a Spot: Find a shady spot in your yard that doesn’t turn into a swamp.
-
Layer It Up: Start with browns, then add greens. Keep it at a 3:1 brown-to-green ratio for best results.
-
Keep It Damp: Your pile should feel like a wrung-out sponge—not sopping, not bone-dry. Add water if it’s too dry.
-
Give It a Stir: Turn the pile every 1-2 weeks with a pitchfork to keep things cooking.
-
Chill and Wait: It takes 6-18 months for compost to become dark, crumbly, and ready, depending on your setup.
If It’s Acting Up
Stinks? Too many greens or too wet. Toss in more browns and turn it.
Not Breaking Down? Probably too dry or short on greens. Add water and some scraps.
Pests? Bury food scraps deep and skip the meat or dairy.
“I went from thinking worms were gross to saving $50 a year on fertilizer. You can too!”
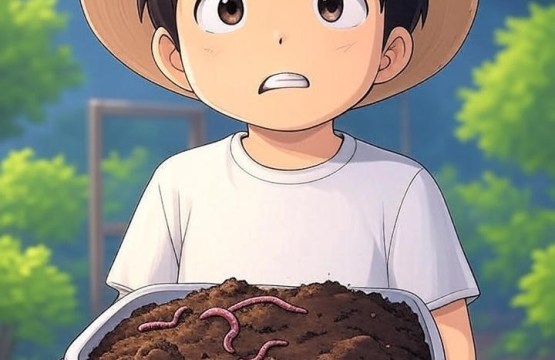
Worm Composting: My Kitchen Counter Miracle
Okay, here’s where things get wild. I stumbled into worm composting—aka vermicomposting—three years ago when my neighbor handed me a plastic bin of dirt and worms before peacing out. “Just feed them your scraps,” she said. I thought she was unhinged, but man, was I wrong.
What’s the Deal?
Worm composting uses red wiggler worms to munch on your kitchen scraps and turn them into “black gold”—worm castings that are basically plant steroids. It’s way better than store-bought fertilizer, and unlike traditional composting where you’re waiting for stuff to rot outside, these squiggly little workers do the job fast and clean.
Why It’s Perfect for Newbies
Crazy Fast: Traditional composting can take 6-18 months. My worms crank out finished compost in 3-4 months, and I barely lift a finger.
Tiny Space, Big Results: My whole setup fits in an 18-gallon bin under my kitchen sink. No yard? No problem. I know folks doing this in tiny NYC apartments. “Oh, if worms freak you out, start with a traditional pile—it’s just as awesome.”
Low Effort: No flipping piles or checking temps. Feed the worms once a week, and they handle the rest.
Year-Round Hustle: Outdoor piles go dormant in winter, but my worms keep chugging indoors—rain, snow, or heatwave, they don’t care.

Kids Love It: My nephew, who can’t sit still for five seconds, spent two hours watching the worms and asking questions. It’s like a science project that actually matters—kids learn about decomposition, nutrient cycles, and pitching in.
Saves Serious Cash: I used to drop $40-50 a year on compost and fertilizer. Now my worms churn out 2-3 pounds of top-tier castings every month. That’s $15-20 a bag at garden centers, so I’m basically printing money.
Planet-Friendly: My little bin keeps my coffee grounds and banana peels from turning into methane in a landfill. It’s like fighting climate change from my kitchen counter.
There’s something weirdly awesome about watching your trash turn into garden treasure with the help of these tiny, wriggly workers. Plus, properly managed bins don’t stink—promise. It’s the most beginner-friendly way to start composting, and it’s perfect whether you’re in a house, an apartment, or a freaking shoebox studio.
How to Get Started
Grab a Bin: A 10-18 gallon plastic storage bin with a lid works great. Drill some air holes in the sides and bottom.
Get Your Worms: Order red wigglers online (about $20-30 for a pound, enough to start). Don’t use regular earthworms—they won’t vibe.
Make Bedding: Shredded newspaper, cardboard, or coconut coir works. Dampen it (like a wrung-out sponge) and fluff it up.
Add Scraps: Start small with fruit and veggie peels, coffee grounds, or crushed eggshells. Bury them in the bedding to avoid smells.
Feed Weekly: Add scraps once a week, but go easy—worms hate acidic stuff like citrus or too much onion. No meat, dairy, or oily foods.
Harvest Castings: In 3-4 months, scoop out the dark, crumbly castings. Push the worms and bedding to one side, add fresh bedding and scraps to the other, and the worms will migrate.
Pro Tips and Rookie Fails to Avoid
I’ll be real—I killed my first batch of worms by overloading them with orange peels (they’re not fans of acidic stuff). Keep it balanced, don’t overfeed, and make sure the bin stays moist but not soggy. If it smells, you’re probably adding too much food or not burying it deep enough. Fix that, and you’re golden.
Pro Tips
Chop or shred materials (for traditional or worm composting) to speed things up. Smaller bits break down faster.
For worm bins, keep a layer of bedding on top to block smells and fruit flies.
If you’re doing both, use worm castings for high-value plants (like veggies or flowers) and traditional compost for bigger areas like lawns.
How to Use Your Garden Gold
When your compost or worm castings are dark, crumbly, and smell earthy, it’s go-time. Here’s what to do:
-
Mix it into garden beds for a nutrient explosion.
-
Sprinkle it on lawns or potted plants as a top-dressing.
-
Brew compost tea for a liquid fertilizer that plants slurp up.
“What’s the weirdest thing you’ve composted? Or, if you’re new, what’s holding you back?”